 The
first step is to locate the Internet Connection Wizard on your computer.
The
first step is to locate the Internet Connection Wizard on your computer. Dial-up Account Setup
For Windows 95, 98, ME
The wizard screens will look slightly different for Windows 2000 or Windows XP but the basic content will be the same.
The following are a series of screens showing the step-by-step process of creating a dial-up account on your computer. Please follow these steps in order. You may also reference these steps while troubleshooting a problem.
The
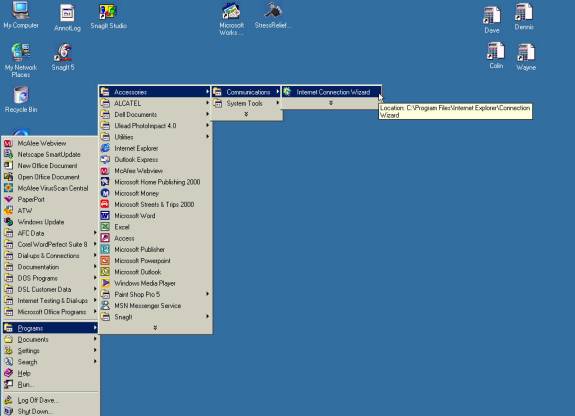
first step is to locate the Internet Connection Wizard on your computer.
When you have found it, Click on the link to start the program.
(In XP it will be under Start>Show All Connections)
Left Click its name to start the Wizard.
When the program starts it will look like the following:
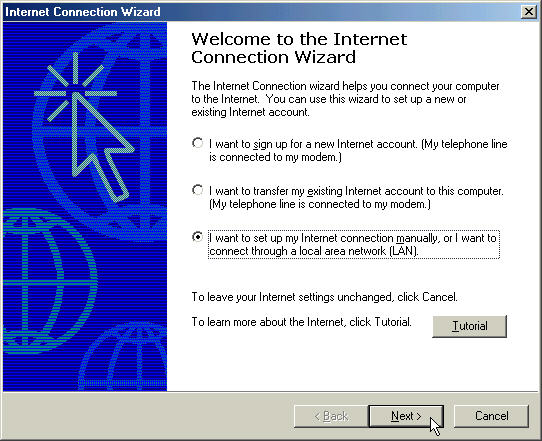
Check the options on the screen to look exactly like that shown above (make sure you say you want to do the setup manually).
Then left click NEXT.
In this next screen you will select the method you are connecting to the Internet with. For this application you will select the option connect through a phone line.
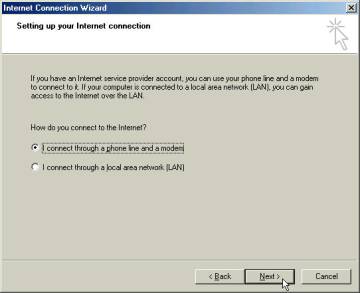
Left click NEXT to continue
This screen is used to select your modem that you will use to connect to the Internet with. Highlight the modem you wish to use.

Click NEXT to continue.
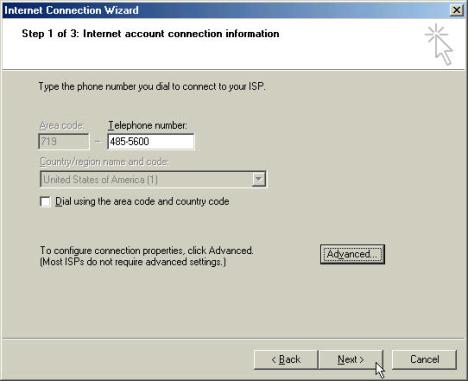
The next screen will allow you to enter the phone number you will dial to connect to the Internet.
These numbers can be found at http://www.trueband.net/roaming.html .
(For the Pueblo Area, the number is 242-9708)
It is best if you know the area you will be traveling to in advance, so that you can check this site from home and have these numbers already written down for your use.
Fill in the correct number, including any special dialing codes that may be needed (like a 9 for an outside line or turn off call waiting, etc.)
If the Dial using area code and country code box is checked be sure to un-check it
To continue, left click on the Advanced button.
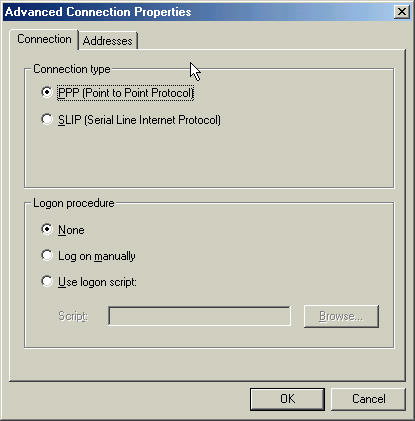
The Advanced button takes you to this screen.
Shown is the Connection tab. It must be set as shown.
Next left click on the Addresses tab.
The Addresses tab is shown below. This tab must be changed and filled in is as follows:.
Primary DNS: 206.168.44.12
Secondary DNS: 216.163.120.20
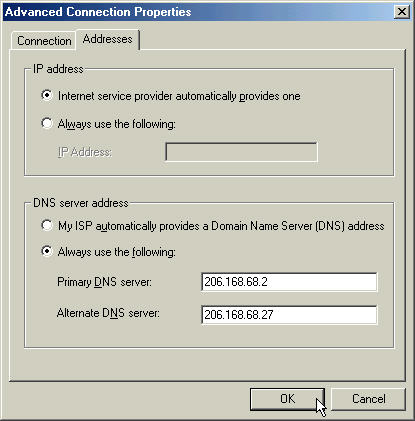
When finished, left click on OK.
You will be returned to this screen.
Once here just left click on NEXT to continue.
The next screen prompts you to enter your Socolo.net account username and password.
Please enter the proper information in the designated box.
Special Note: For the national dial-ups only you will use your full username@socolo.net address. (Be sure to replace ‘username’ with your actual username.)
Fill in your current password. You will notice that the password shows up as a string of *’s. This is normal. Also be sure that you overwrite anything that is already in the password field, not append to it.
The completed page is shown below:
When the page is completed, left click on NEXT to continue.
This next page prompts you to enter in a name for the Internet connection you are creating.
This can be any name you would like to have, maybe something like “SocoloDial.”.
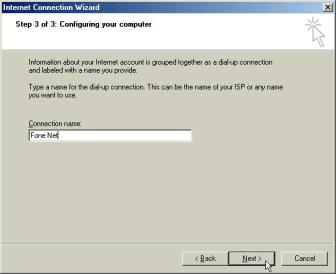
After typing in the name, left click on NEXT to continue until you see this last screen in the connection wizard. You can either have the check mark in the box on the screen or not, this is up to you.
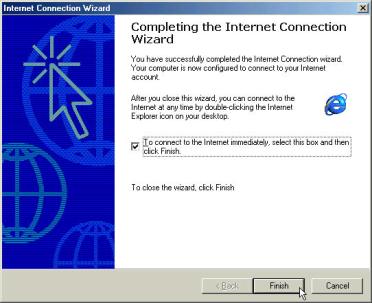
When you are ready you can left click on Finish.
Your Dial-up Internet connection is now complete.
The following shows you how to make the necessary changes to your Email account(s)
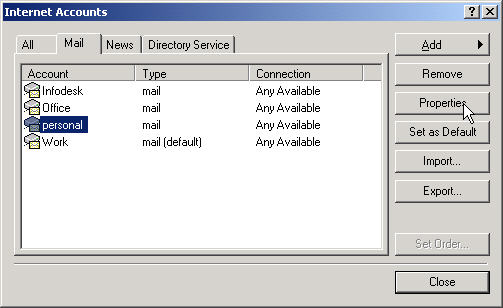
Open Outlook Express on your computer. On the top bar, left click on the Tools button. Then go to and click on Accounts. You should see the following screen. Highlight the account you wish to make the changes to, then click the Properties button.
After clicking on properties you will see the screen similar to the on below.
Click on the Servers tab. This is the screen where you will make the necessary changes. It should look similar to the screen below.
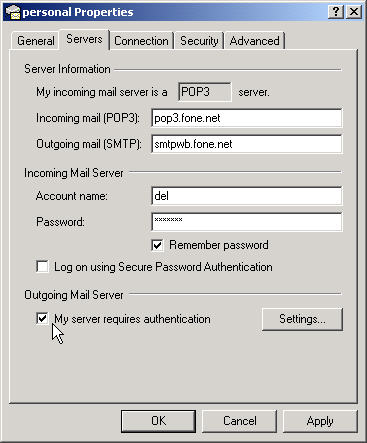
Enter/change to the following servers:
Incoming mail (POP3): pop.socolo.net
Outgoing mail (SMTP): mail.socolo.net
Check the "My server requires authentication" box as shown
This completes what needs to be entered.
To finish:
Click on the Apply button, then OK.
You can now close your screens or make these changes to any other email accounts you may have.